
A wireless LED quiz button system with sounds!
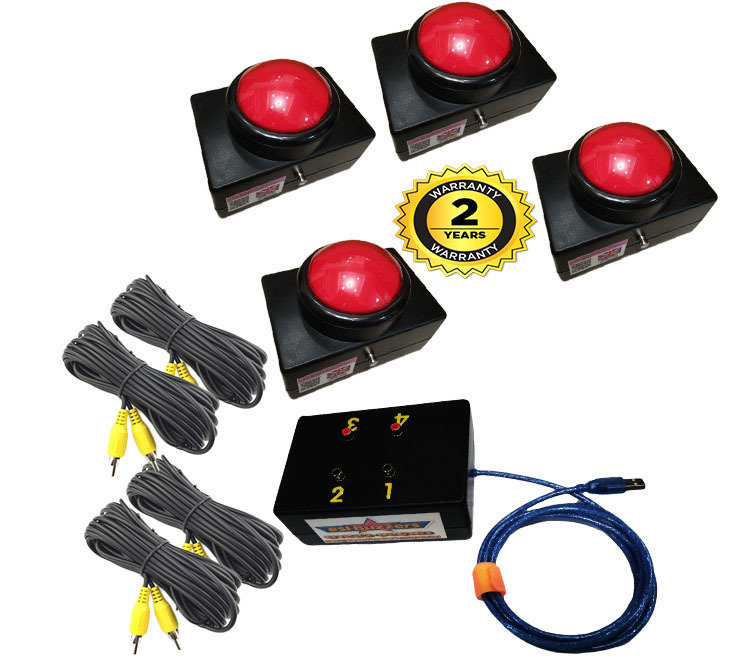
A few years ago I found myself trying to judge who had put their hand up first in a house quiz competition at school. When they got it the answer wrong, I was then asked who was next. It ended up with staff all over the room trying to agree on an order. There had to be a better way, but looking online, I could only find expensive systems requiring trailing wires, or cheaper systems which made a noise, but you still had to judge who was first.
So when @computingchamps lead a MicroBit Makecodesession at the Scratch Conference last year on using the Radio feature, I just had to see if I could make a quiz system
Requirements
So what was I looking to achieve…
- Reasonable price
- Robust buttons
- Wireless connection between buzzers
- Indicate the order of buttons pressed.
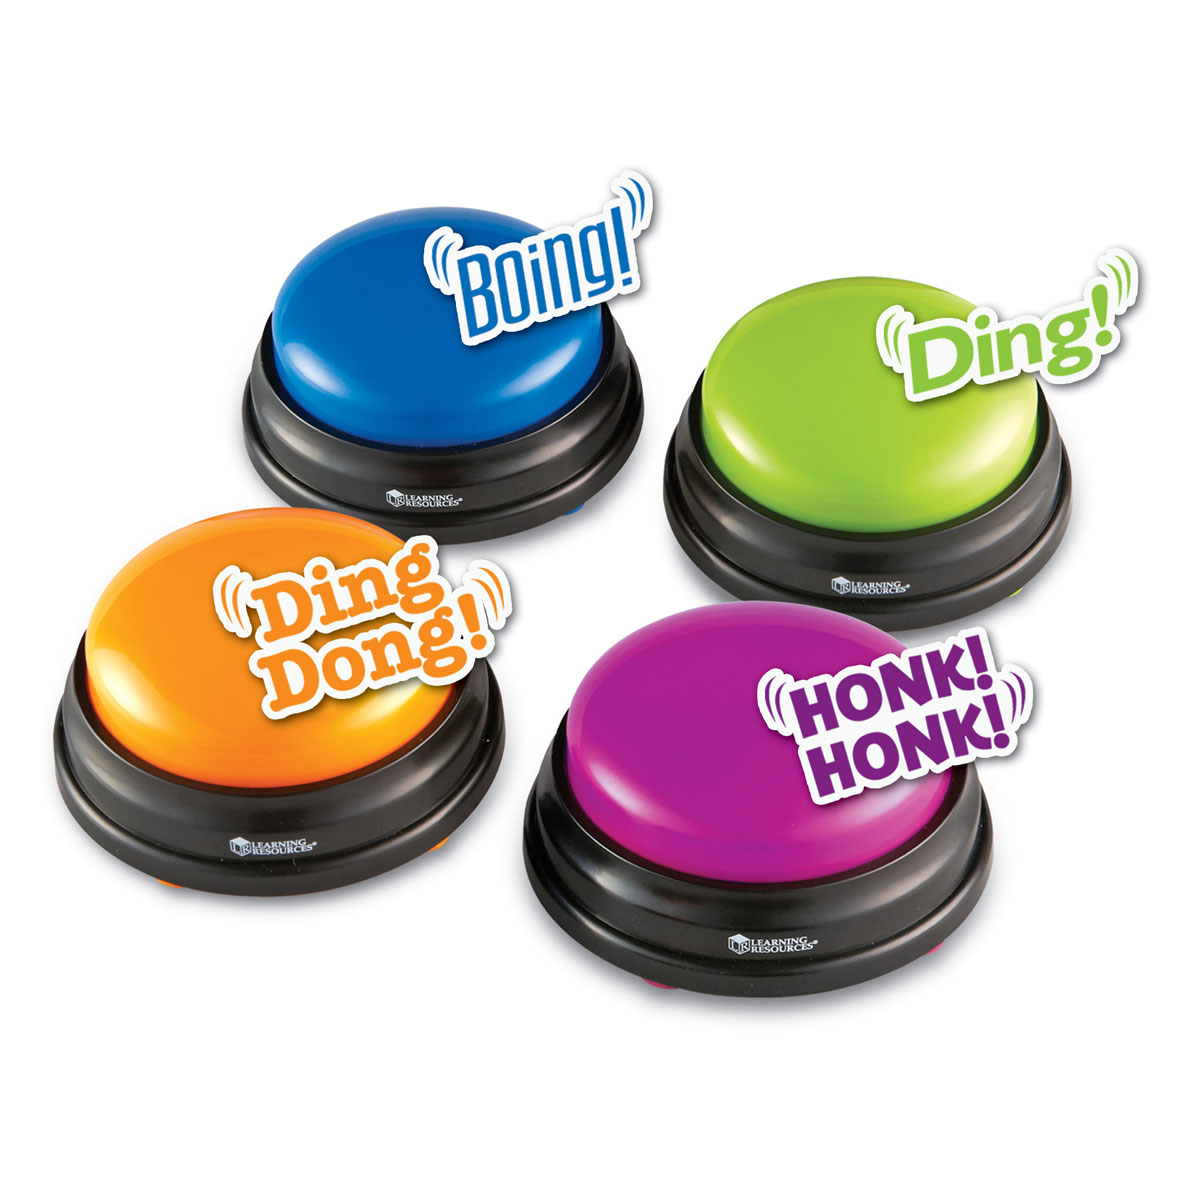
- Make a sound for the first pressed button
- Reset for next question
Hardware
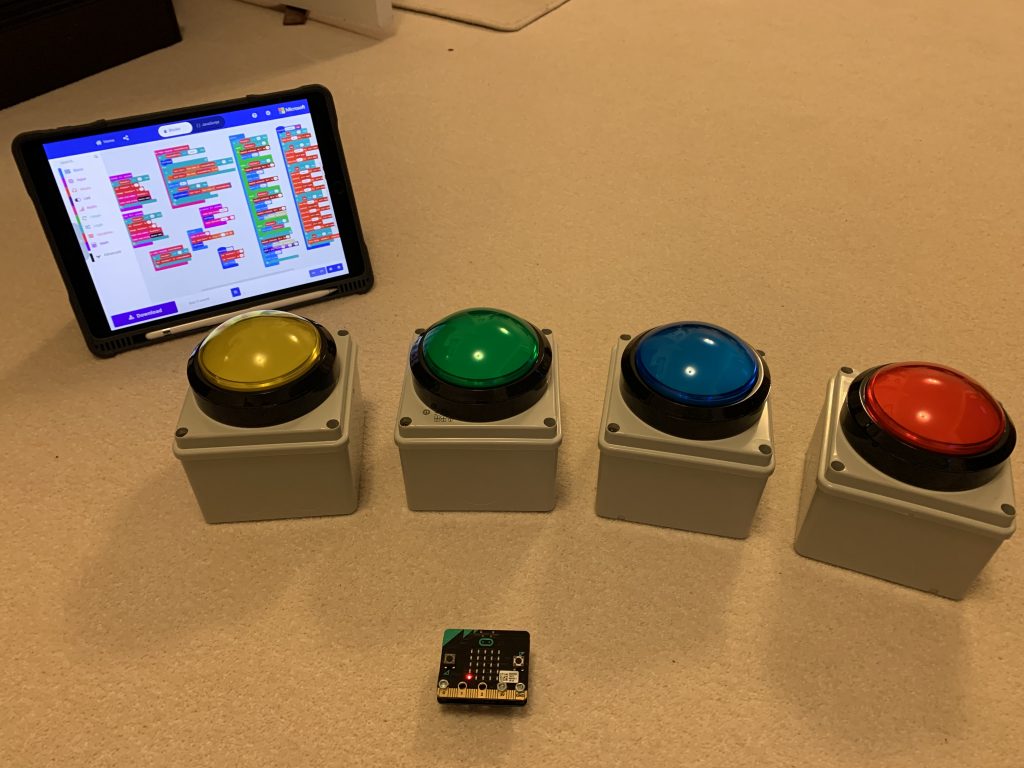
I decided to use Big Buttons from @coolcomponents, giving a microswitch input to the MicroBit and an LED to indicate the button had been pressed.

The LED in the button turned out to be 12V rated, so it became easiest to use a 9V battery added to the 3V output of the MicroBit to create a total of 12V. The LED is then controlled from pin 2 using a 2N7000 N Type FET transistor.
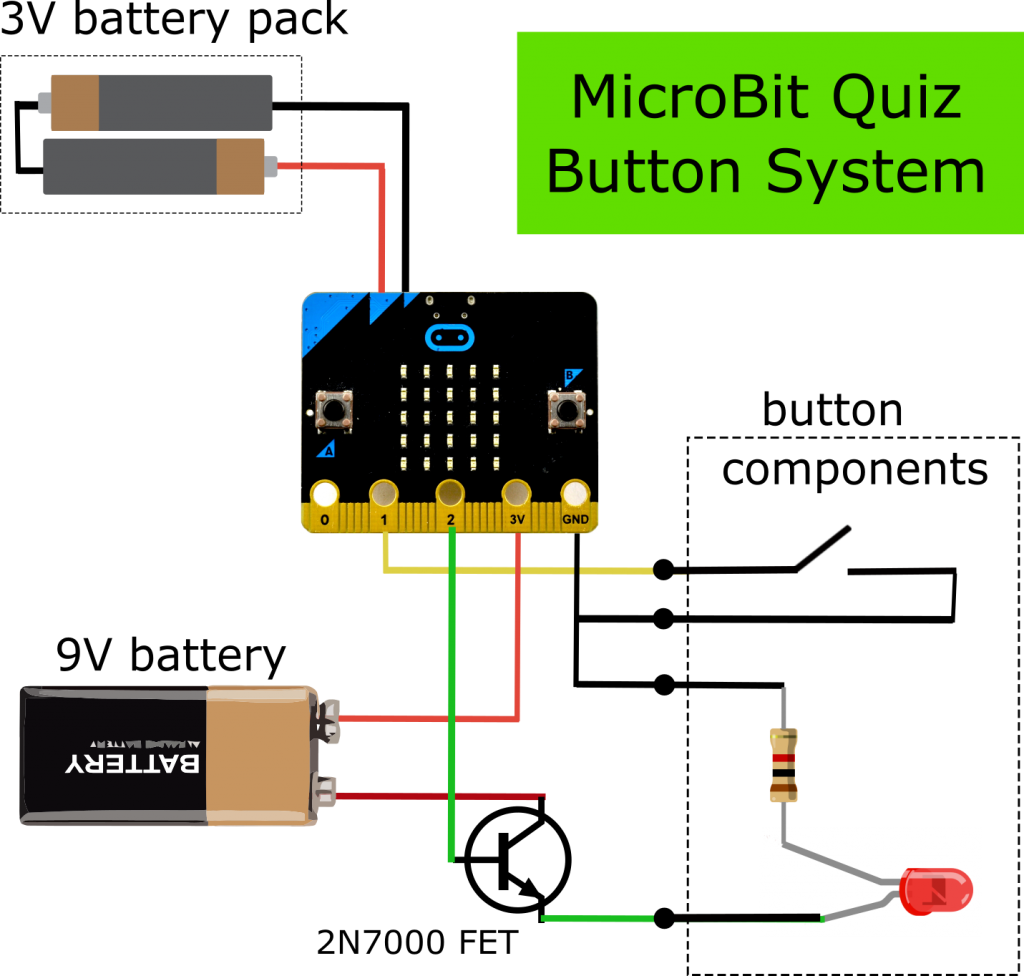
The schematic above shows how the circuit is connected together.
I decided to avoid soldering and use crimp connectors, M4 nuts and bolts and 3A connector strip to connect the 9v battery clip and transistor, all available from a local electrical shop.
The whole lot is mounted in a 10cm x 10cm x 8cm plastic enclosure junction box, both from Farnells.
The Algorithm
The algorithm is going to need some variables to store states.
- Pressed – has the button been pressed yet
0 = No, 1 = Yes - Position – how many people have pressed the button so far. Initalised to 0. When Pressed = 1, this will not be allowed to increase, thus storing your position for this question.
- Player_List – stores the MicroBit names to identify each button and make same sound each time the button is pressed,
Initialising the game and each question.
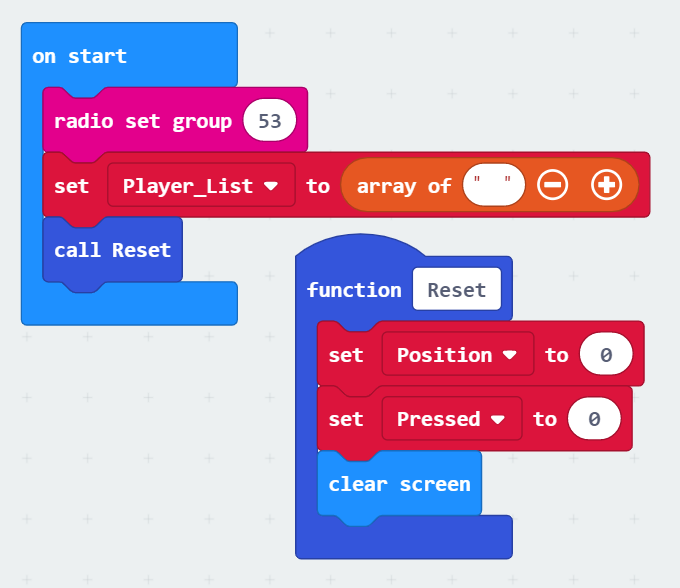
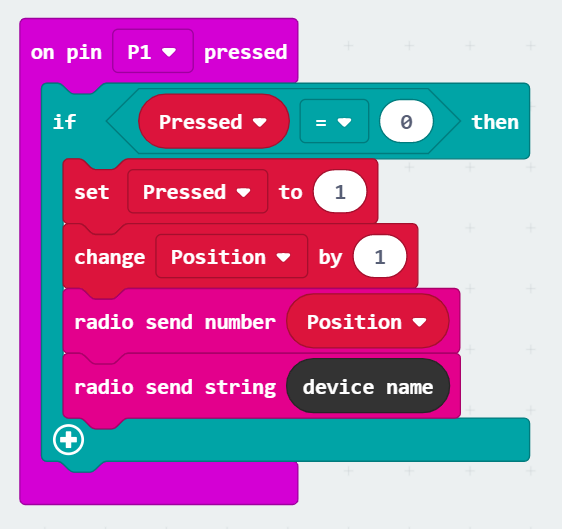
Pressing the button
When the button is pressed, if the button hasn’t been pressed before (Pressed = 0) then a number of things have to happen.
- Pressed is set to 1
- The position needs to be increased by 1
(As pressed is now 1, position on this Microbit should not increase any further) - The new position number is sent to all the other MicroBits.
- The MicroBit name will be sent as well so that, if Position = 1, the correct sound can be made.
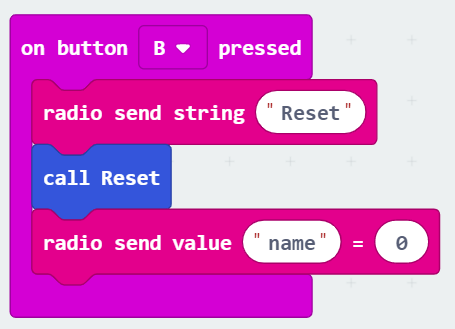
Button B to Reset
Another input to the system is required to reset all the buttons for the next question and for this, we use Button B on a MicroBit itself. This will set position and pressed to 0 on each MicroBit by calling the Reset function. (It is also important to call the Reset function on the Microbit you are using.)
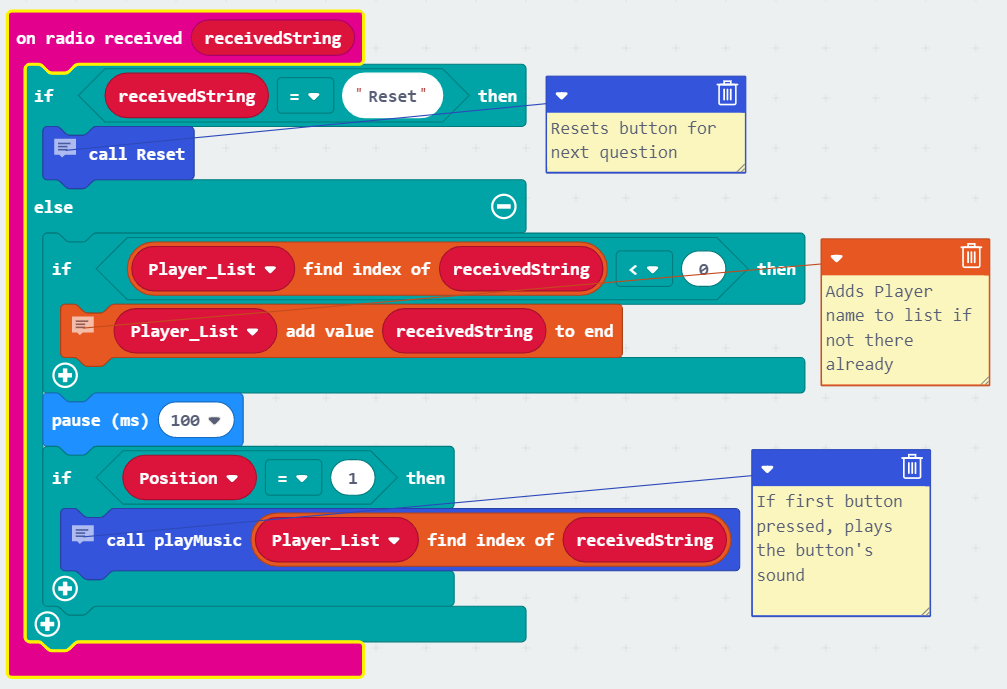
Receiving a String
On receiving radio from other MicroBits, there are a number of actions to achieve.
If the string “Reset” is received, then Positions and Pressed need to be set to initial values using the Reset function.
Else if a different string is received, the algorithm will see this as a button being pressed by another user. It must then do two things.
- Firstly it will check to see if this MicroBit is in the list of Players…
If not, it will add it… - Secondly, it will check if this is the first button pressed, it will look up the MicroBits position in the list and play the relevant sound by sending the list position to the playMusic function.
Play Music function
This part of the algorithm plays a sound, depending on which button is pressed first. The play music function receives a number and that is used to determine which sound is pressed. Note that as well as different pitches, there are a different number of notes for each button.
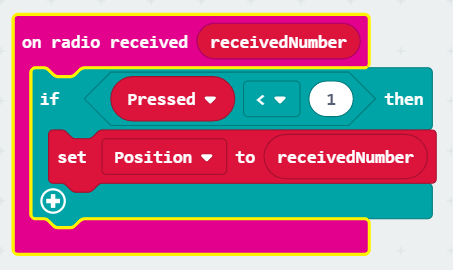
Receiving a number
If a number is received, then it means that someone has pressed a button. The new Position variable is being received, and needs to be set, but only if this button hasn’t already been pressed.
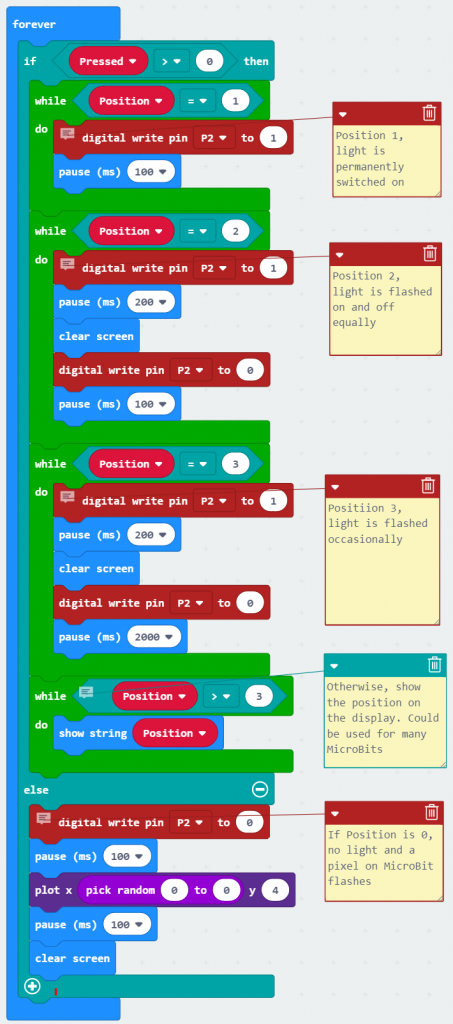
Flashing the light
The control of the lights works simply in a Forever loop, depending on the value of the Position variable.
- 0 = no light, but a blink on the MicroBit
- 1 = LED permanently on
- 2 = flashing LED
- 3 = blinking LED
- >3 = no light
The full quiz button with sound code is available here. https://makecode.microbit.org/_PFR7M4JVfdRo
I added the ability to use the Button A instead of a switch, and it should also be possible to display Position instead of using an LED, so this could be run just on a group of MicroBits with no external hardware.
Also, I have used four buttons, but more can be added. Have fun!